Unity V3 case assembly
The Unity V3 case from Kiwi Electronics is a laser-cut enclosure that fits the Raspberry Pi 5 and many different HATs.
Parts list
- 6x acrylic parts
- 8x 6mm M2.5 screws
- 4x 20mm M/F hex spacers
- 4x 20mm F/F hex spacers
- 4x 6mm M/F hex spacers
- 1x hex tool for spacers
- 4x rubber feet
- 1x 2x20 female header with 6mm pins
Remarks
- You will need a screwdriver for assembly.
- First remove the protective film from the acrylic parts.
- Because the parts are made of cast acrylic, there may be differences in thickness. We try to prevent parts from not fitting as much as possible. In the unlikely event that this does happen, please contact us for a replacement.
- If you want to mount the case on the wall, make sure that the screws in the wall do not protrude more than 7 mm to prevent them from pressing against the bottom of the Raspberry Pi.
Step 1
First, place the 6 mm spacers on the base plate with screws as shown in the image below.
Step 2
Place the Raspberry Pi with Active Cooler already mounted. It is highly recommended to use an Active Cooler due to heat generation.
Step 3
Next, mount the 20 mm female/female spacers.
Step 4
Depending on which HAT/extension you wish to install, you can now install the supplied header. Note which header is included with the HAT/extension. If the black part of the HAT header is higher than 8.5 mm, then the supplied header should not be used. Try this carefully. The total height between the Raspberry Pi and the HAT is 20 mm.
For example, the header in the image below has a higher black section and longer pins. In this case, the supplied header can be omitted.
Step 5
Carefully place the HAT/extension on the Raspberry Pi and screw the 20mm male/female spacers on top.
Step 6
The simplest way is to first place the front and rear plates and then carefully slide the side plates into the holes in the bottom plate as shown below.
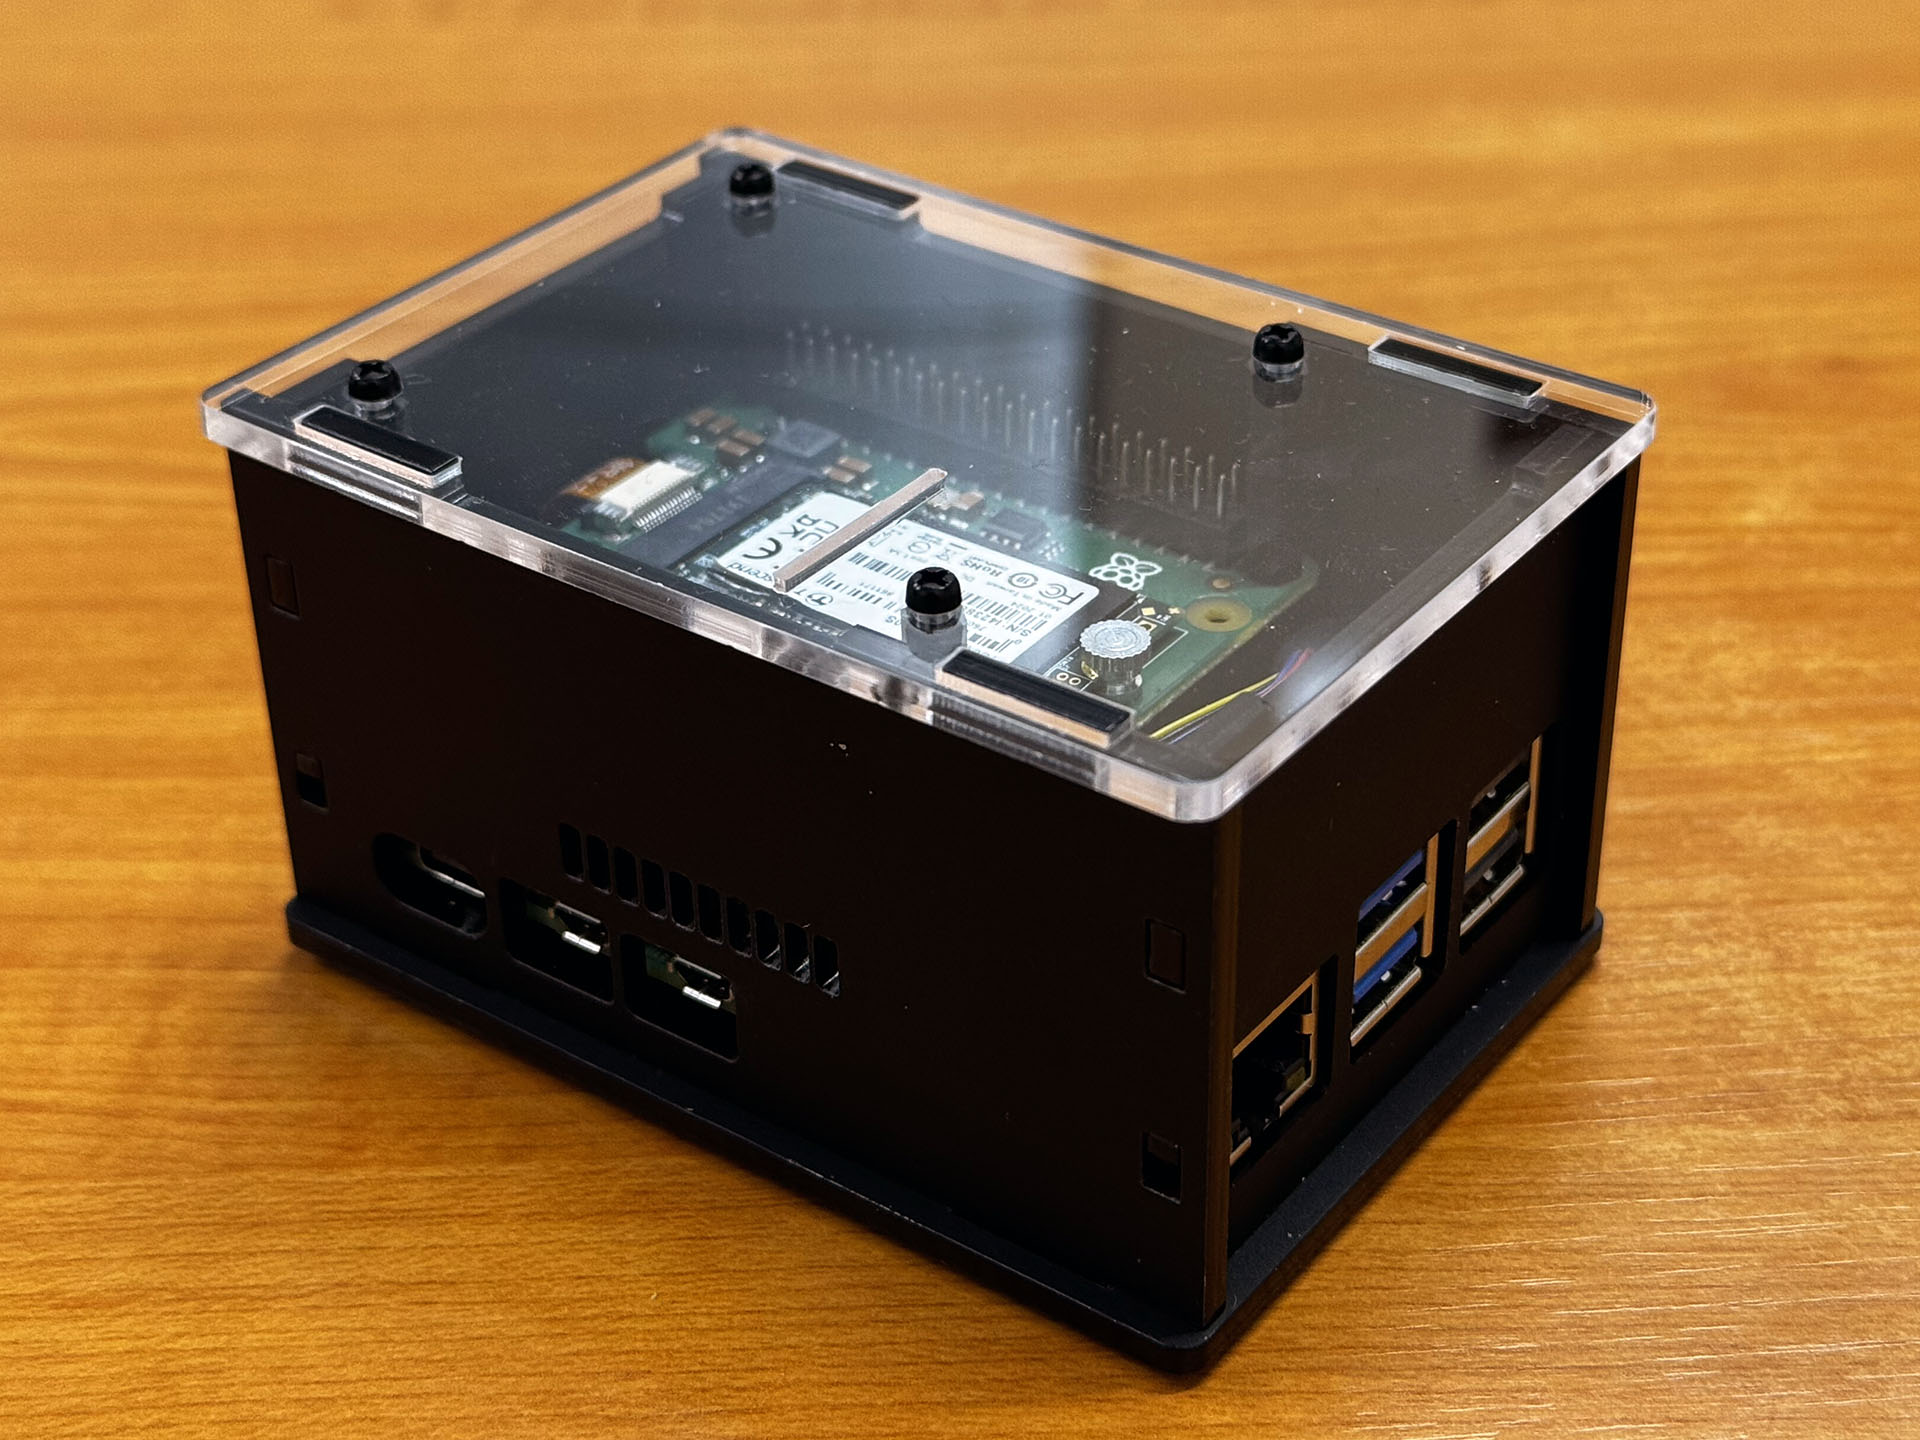
Step 7
Finally, place the lid on top and secure it with the last remaining screws.
Related Articles
Unity V2 case for Raspberry Pi
The Unity V2 case from Kiwi Electronics is a laser-cut enclosure that is relatively easy to assemble and provides protection for the Raspberry Pi and any HAT/add-on boards. Specific instructions Unity V2 PoE case for Raspberry Pi 4 Unity V2 PoE case ...Unity V2 PoE case for RPi5
The Unity V2 PoE enclosure from Kiwi Electronics is a laser-cut enclosure that fits the PoE HAT from Waveshare and a Raspberry Pi 5. Parts list 6x acrylic parts 8x 6mm M2.5 screws 4x 10mm M/F hex spacers 4x 6mm M/F hex spacers 1x hex tool for spacers ...Unity V2 PoE case for RPi4
The Unity V2 PoE enclosure from Kiwi Electronics is a laser-cut enclosure that provides space for the official Raspberry Pi PoE+ HAT and a Raspberry Pi 4. Parts list 6x acrylic parts 8x 6mm M2.5 screws 4x 10mm M/F hex spacers 4x 8mm F/F hex spacers ...